This post is about the "Kullen" bed-side table. It has 3 drawers and can hold quite a few things.
 The "Kullen". This is actually made in Denmark!
 Opening the package, we find a nice heap of wood.
 Almost everything is for the drawers except for the big panels on the right and the 2 smallest sized planks and the 2 squarish panels in the middle.
 The contents of the goody bag and the tools we need. The only things you need to bring to the party are a hammer, ruler, pen(cil) and a phillips screwdriver.
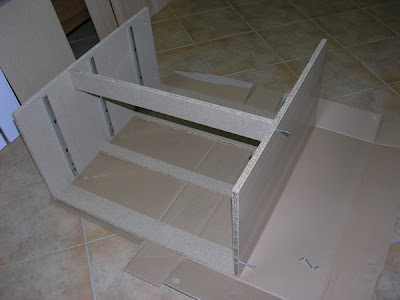
 Leave the cardboard on the floor to work on. Put the 2 side panels down like this and get the sliders and screws.
 Screw the sliders on the panels.
 Then get the 5 smallest pieces of birch coloured wood (beams) and put dowels in the ends of them. The small beams get 2 dowels at each end and the wider ones only 1.
 Put the beams in place.
 Put the dowels in the other side.
 Position the other side-panel over the dowels and carefully attach it.
 Get 2 screws and the Allen-key and fix this side onto the 2 bigger beams.
 Roll the structure on it's front and fix the other side the same way.
 Then get the top panel and screw in the 2 fixation screws (who knows their proper name in English or Dutch?)
 Put the dowels and screw-tighteners in the side panels. Be sure to use the right ones because the designers at Ikea thought it was handy to use 2 different sizes. The small ones will not fit properly.
 Then mount the top-panel.
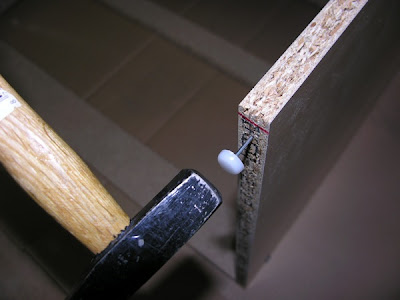
 Now get the 2 back panels and use the provided nails to attach them to the table.
 Finally hammer the "feet" in the bottom.
 The main structure should now look like this.
 Put it upright and admire the work sofar.
 Now the drawers. There are 2 bigger ones and 1 smaller one. They're put together roughly the same way. Shown is the small one. Get the pieces for 1 drawer.
 Use the plastic screws to attach these 3 parts together.
 Then get the bottom board...
 ... and slide it in. Make sure it fits properly before continuing.
 Get 2 more fixation screws and screw them in the back of the front panel of the drawer.
 Put the screw-tighteners into the sides of the drawer. The dowel should already be in there. If not, do so yourself.
 Attach the drawer.
 Now, shove the drawer into the table and pull it out again. As you pull it out the sliders will come out as well. Position the slider so that it can be screwed onto the drawer.
 Fix the drawers and...
 ... voila!
knap werk geleverd!!
ReplyDelete@ Ma: Dank je. Het is niet moeilijk maar omdat ik ook foto's maak nu doe ik er dubbel zo lang over...
ReplyDeleteDo you know how to remove the screw-tighteners after you assemble something? I'm trying to remove a shelf from an Ikea bookshelf and it uses the same 'fixation screws' or whatever they're called and the same tighteners as in the Kullen, but i cant get the tightener off the screw! Thanks! great blog!
ReplyDelete@ Suzy: First of all: If the shelf is fixed with these tighteners, you should probably not remove it as it could very well be a piece required to hold everything together!
ReplyDeleteIf you still want it out... Yeah, that's a bit of a pain in the ass ;-) You could try poking a screw driver in to the hold in the side and try to wiggle it out. Or if they are iron you could try a magnet maybe. You probably need a strong magnet though.
Or maybe a stick with super glue on the end that you glue to it and then pull it out?
Good luck :-)