This is a packaged IKEA Bjurön. It's a round piece of wood with 3 wheels. You can use it to put a big plant on for example. That's what I'm using it for anyway. You can't really call this DIY because it makes even LEGO look like more work!
Like I said; a piece of wood and parts to mount 3 small wheels.
This is how each wheel is put together.
Still a round piece of wood but now it has wheels on it...
Very handy! :-)
Wednesday, January 12, 2011
Friday, December 31, 2010
A small IKEA Lack shelf
Here's an empty wall. You have to drill two holes in it for this tiny Lack shelf that I'm mounting. The holes need to be very accurate or the shelf will not fit well.
I'm actually holding it upside down, sorry. The shelf is placed over 2 screws and should fix itself when pressed down over the screws.
The end result.
I'm actually holding it upside down, sorry. The shelf is placed over 2 screws and should fix itself when pressed down over the screws.
The end result.
Monday, November 15, 2010
A security-strip on your door.
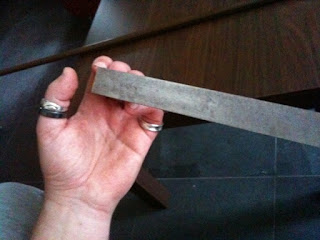
To put security strips on your door, start by cutting them at the right length.
If you like to work neatly, use a file to smoothen the edges. Do your nails while you're at it.
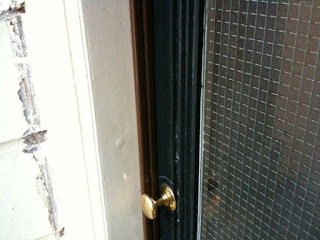
Put on the door strip first. Mark the edge of the door frame on the door.
Depending on the kind of strip you use you need to position it on the door, in my case the strip has to be 2mm away from where I marked.
Fix the strip with only 2 or 3 screws.
See if the door still closes (don't forget your keys!)
If it looks fine, get the other strip and mark where it needs to be.
Screw that strip on with 2-3 screws as well and check to see if the door still closes. If it does, put in 20 more screws and it's done!
Sunday, September 19, 2010
Mounting a TV
These days most people have flat TV's. It saves a lot of space over the old CRT monsters we used to have. Another advantage is that these TV's can be mounted on the wall. Mine was standing on my (tiny) dining table and I really need the space so it needed to go on the wall.
 So I bought this wall mounting kit from Vogel's.
 The contents. Almost everything you need apart from the drill, drill bits and screw driver.
 First you attach the brackets to the back of your tellie. Yes, in the picture you can see I had accidentally screwed one a bit higher than the other. I found out when I was hanging it on the wall, very frustrating. OOPS!
 Put together the part that goes on the wall.
 Drrrrrrrrrrrill holes.
 Mount the wall-part. Vogel's come with a little water-bubble to see if it's horizontal. Now I know my table is not ;-/
 And then hang your TV on the wall-part. All done.
 So I bought this wall mounting kit from Vogel's.
 The contents. Almost everything you need apart from the drill, drill bits and screw driver.
 First you attach the brackets to the back of your tellie. Yes, in the picture you can see I had accidentally screwed one a bit higher than the other. I found out when I was hanging it on the wall, very frustrating. OOPS!
 Put together the part that goes on the wall.
 Drrrrrrrrrrrill holes.
 Mount the wall-part. Vogel's come with a little water-bubble to see if it's horizontal. Now I know my table is not ;-/
 And then hang your TV on the wall-part. All done.
Subscribe to:
Posts (Atom)


