Friday, February 22, 2008

Mounting a switch on a lamp

Sometimes you need something and you just don't feel like forking out the right amount of money. Or you just like the design. I ended up with this el-cheapo lamp. It was bought at Go-Lo, you can guess about the quality then. Anyway, it has a switch, but it's inside the lampshade. Fair enough, now you know why it was so cheap. We're speaking AU$9 or something. No money left for an easy to reach switch.

So I bought a switch myself. It has to be one that's suitable for mains power, not every switch can do that. Pay attention to that if this inspires you to do the same!

Right, so here's the lamp.

And here's the switch. Good thinking huh?

Top view of the lamp.

Bottom view of the lamp.

Remove the bottom first. This is ugly, sticky stuff that after removig can only be thrown away (in my case).
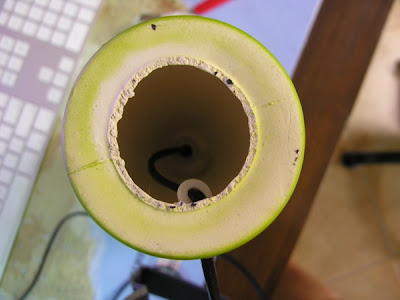
When it's gone there's a nice hole left and we can admire the complicated inside (not).

In the meantime back at the ranch; The Switch.

The switch requires a hole to put it in. I bought nice special drill bits that are aparently made for glass and tiles. This is the big one...

... and this is the small one. I usually drill holes in 2 stages.

Drilling. The base of the lamp seemed to be made of clay, hardly baked at all, supersoft. Oh well.

I made a nice round hole. Ever noticed that when you drill with a metal drill the holes are actually triangular?

To be able to work properly we have to pull out the wires.

This is tricky. The cord needs to be cut open. Get some wooden stick and put it through the wire effectively creating a cutting surface. Knowing that there are only 2 wires inside, place a knife in the middle and start cutting the wire open for about 5 cm. Make sure you stay in the middle otherwise you may damage one of the inside wires.

The result should be something like this.

Cut one of the wires in half. It doesn't matter which one because we're working with alternating current (meaning the + and - (ground) change usually 50 times a second (50Hz)).

Strip the ends so that about 5 mm of copper is exposed.

Twist the ends together nicely so they seem 1 thick wire.

Put the ends in the switch and fix the wire very tight.

Put the switch inside the lamp and make it stick out through the hole.

Put the switch-cover on and it's done!

Monday, February 18, 2008

N-scale test track

In preparation of making my coffee table model railroad I needed a small test track so that I could test and repair loco's and see how certain things like coupling/decoupling works in practice.

I made a little trackplan first.

Put on the tracks


To fix the tracks onto the wood you need tiny little nails. Be carefull when hammering them in. To get them in all the way I used a big screwdriver, positioned it on the (flat) head of a nail and gave it a few whacks.

Expedit hack 2: Drawers phase 2

This post is about making the actual drawers that go into the Ikea Expedit cupboard. In the previous post about this I showed how to make the casing that the drawers go in to.

First, get your wood together. Basically there are 3 sizes of wood required. For 4 drawers we need:
- 4x bottom panel the full size of the drawer.
- 8x front/back panels the full width of the drawer
- 8x side panels having the full drawer length - (minus) 2x the thickness of the front/back panel

The width of the front-, back- and side panels (actually the whole height of the complete drawer) doesn't matter much as long as it's about 2cm under the max. height of the drawer. If you make them any higher, you can't put them in.

Also make the bottom panel's width not too tight in between the rails. If in doubt, it can easily be 1mm less.

Before starting, take some measures. This way you know where screws for mounting the drawer on the rails will be so you don't put any nails in that spot before mounting it.

Measure the distance from the hole closest to the front and from that hole to the next hole(s).

I made a little sketch. The drawerbottom is on the left. The casing on the right. The dots are the places where the drawer will be attached to the rails.

Mark these spots on the drawer bottom panel. In my case 37mm from the front...

... and another 251mm from there towards the back.

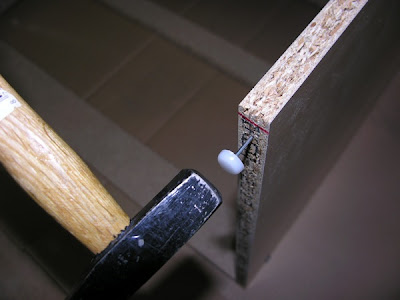
Get some small nails. I used whatever I could find. These nails have round heads, that's not very easy to use but I really needed to use them.

Hammer them in at half the thickness of the front-, back- and side panels from the edge. Not all the way through!

Be sure not to hammer any nails near the spot where the panel will be mounted on the rails.


Fix the sides on the bottom panel one by one.

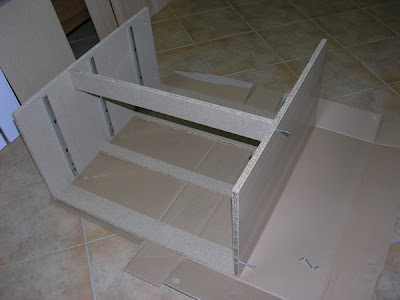
And see, the drawer is starting to take shape. This is the bottom view...

... and this is the top view.

Next, the sides have to be screwed together. Get 4 screws per drawer (16 for my 4 drawers) and get a drill a bit thinner than the inner bit of the screw.

Pre-drill the holes for the screws. Make sure to keep the panels in the correct to-be position. Wood can be a bit crooked sometimes.

When the screws are in, you should have a rock-solid drawer.

Now get the rails and mark the exact holes for the screws. This is one closest to the front...

... and the one close to the back.

Pre-drill the holes for these screws as well. Use a drill-bit suitable for the screws you use now.

These screws should be a lot smaller.

Put all the rails on this way.

And in go the drawers.

The drawers in place, sliding open and shut beautifully.

All that's missing now is a front for the drawers. At least they're functional. The front I'm going to make of 4mm plate. It has to look like the rest of the Expedit so I think I'll use a light pine and give it a good rubb of bees wax. We'll see.

Friday, February 15, 2008

The IKEA Kullen

There seems to be a never-ending stream of Ikea furniture coming into my house. I -think- this is the last one for now but you never know!

This post is about the "Kullen" bed-side table. It has 3 drawers and can hold quite a few things.

The "Kullen". This is actually made in Denmark!

Opening the package, we find a nice heap of wood.

Almost everything is for the drawers except for the big panels on the right and the 2 smallest sized planks and the 2 squarish panels in the middle.

The contents of the goody bag and the tools we need. The only things you need to bring to the party are a hammer, ruler, pen(cil) and a phillips screwdriver.

Leave the cardboard on the floor to work on. Put the 2 side panels down like this and get the sliders and screws.

Screw the sliders on the panels.

Then get the 5 smallest pieces of birch coloured wood (beams) and put dowels in the ends of them. The small beams get 2 dowels at each end and the wider ones only 1.

Put the beams in place.

Put the dowels in the other side.

Position the other side-panel over the dowels and carefully attach it.

Get 2 screws and the Allen-key and fix this side onto the 2 bigger beams.

Roll the structure on it's front and fix the other side the same way.

Then get the top panel and screw in the 2 fixation screws (who knows their proper name in English or Dutch?)

Put the dowels and screw-tighteners in the side panels. Be sure to use the right ones because the designers at Ikea thought it was handy to use 2 different sizes. The small ones will not fit properly.

Then mount the top-panel.

Now get the 2 back panels and use the provided nails to attach them to the table.

Finally hammer the "feet" in the bottom.

The main structure should now look like this.

Put it upright and admire the work sofar.

Now the drawers. There are 2 bigger ones and 1 smaller one. They're put together roughly the same way. Shown is the small one. Get the pieces for 1 drawer.

Use the plastic screws to attach these 3 parts together.

Then get the bottom board...

... and slide it in. Make sure it fits properly before continuing.

Get 2 more fixation screws and screw them in the back of the front panel of the drawer.

Put the screw-tighteners into the sides of the drawer. The dowel should already be in there. If not, do so yourself.

Attach the drawer.

Now, shove the drawer into the table and pull it out again. As you pull it out the sliders will come out as well. Position the slider so that it can be screwed onto the drawer.

Fix the drawers and...

... voila!