So I bought a switch myself. It has to be one that's suitable for mains power, not every switch can do that. Pay attention to that if this inspires you to do the same!
 Right, so here's the lamp.
 And here's the switch. Good thinking huh?
 Top view of the lamp.
 Bottom view of the lamp.
 Remove the bottom first. This is ugly, sticky stuff that after removig can only be thrown away (in my case).
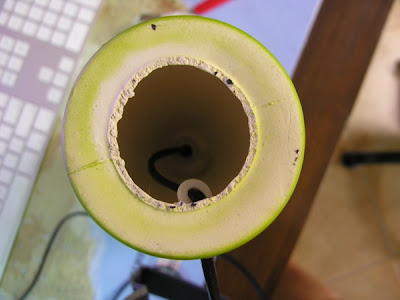
 When it's gone there's a nice hole left and we can admire the complicated inside (not).
 In the meantime back at the ranch; The Switch.
 The switch requires a hole to put it in. I bought nice special drill bits that are aparently made for glass and tiles. This is the big one...
 ... and this is the small one. I usually drill holes in 2 stages.
 Drilling. The base of the lamp seemed to be made of clay, hardly baked at all, supersoft. Oh well.
 I made a nice round hole. Ever noticed that when you drill with a metal drill the holes are actually triangular?
 To be able to work properly we have to pull out the wires.
 This is tricky. The cord needs to be cut open. Get some wooden stick and put it through the wire effectively creating a cutting surface. Knowing that there are only 2 wires inside, place a knife in the middle and start cutting the wire open for about 5 cm. Make sure you stay in the middle otherwise you may damage one of the inside wires.
 The result should be something like this.
 Cut one of the wires in half. It doesn't matter which one because we're working with alternating current (meaning the + and - (ground) change usually 50 times a second (50Hz)).
 Strip the ends so that about 5 mm of copper is exposed.
 Twist the ends together nicely so they seem 1 thick wire.
 Put the ends in the switch and fix the wire very tight.
 Put the switch inside the lamp and make it stick out through the hole.
 Put the switch-cover on and it's done!

7 comments:
Very creative!
I noticed it was made in China.
I guess the US isn't the only country with that problem.
Thanks!
What problem? You mean that China is finally able to make some money too? I think the US and Europe have been making more than enough money now. It's time to spread the love a bit...
There's a lot of fuss here in Holland these days about the Olympic games, should we be in them and should we attend the opening party. All because of the questionable human rights situation over there.
Hypocritical bastards.. we import i dunno how much Chinese shit every day and there's i dunno how many business deals on the way. So they use Olympics to test their replacement instant self inflating throwaway soul. Or something.. puke.
Nice work on the switch btw :-)
The Dutch are bnot exactly known for their human rights care anyway. All they care about is $$$...
Thanks btw ;-)
It seems you spend more time making photos and writing the blog then altering the switch ;)
I only have 1930's stuff in my house, everything has nice big switches in logical places, modern stuff, humbug!
@ Joeri: "modern stuff, humbug!" You mean things like the internet and such? Or computers maybe? ;-P
It did take about 4 times longer coz of the photo's btw...
Post a Comment